How to Install Day & Night Blinds
-
Lovely jubbly – your Day & Night blind has arrived and now all that’s left is to install it!
It’s really straight forward and it will be up in your window in no time, just follow these easy steps!Step 1 - Headbox Option
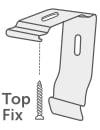
Our brackets can either be fitted top fix (to the top of the recess or to the ceiling), or face fix (on to a wall), so decide on which way these brackets will be fitted before you start drilling holes.
The first two brackets need to be fitted as close to the ends of the blind as possible, just make sure they don’t get in the way of the mechanism. If your blind is particularly large you will have additional brackets which should be placed evenly along the width of the blind to support the weight.
Mark with a pencil where the brackets are to be fixed and then drill the holes.
Once the hole has been drilled, insert a wall plug and screw the brackets firmly in place.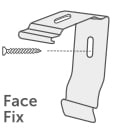
Step 2 - Headbox Option
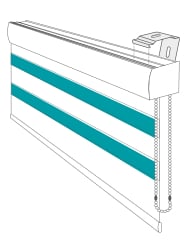
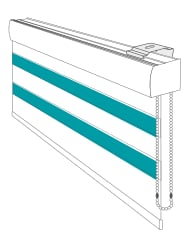
To attach the blind, hook the front ridge of the headrail into the front of the top clip. Push the cassette up until the back ridge slides in and clips into the back of the top clip, snapping the headrail into place.
Step 3 - Headbox Option
Fit the child safety device by putting the chain through the hook, positioning the device in a position that ensures the chain is under tension but not strained (as this will cause damage to the chain). The chain should end 1500mm above the floor to ensure it is out of reach of children. Mark where the hole needs to drilled and then drill the hole, insert the wall plug and screw into place.

Step 1 - Standard (without Headbox)
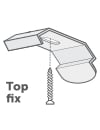
The bracket needs to be fitted to the top of the recess (this version of the blind can only be top fixed). Drill a single hole, insert the wall plug and screw the bracket into place, making sure the protruding tab of the bracket is closest the window. Repeat this for the other bracket.
Brackets must sit on each side of the rail, about 50mm away from the end. Make sure that any remaining brackets are evenly distributed along the rail. Position the front edge of the bracket at least 70mm away from the window. You should also take into consideration any fixings on your windows such as handles that might obstruct the blind as it’s raised and lowered.

Step 2 - Standard (without Headbox)
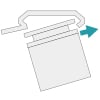
To attach the blind, hook the front ridge of the headrail into the front of the top clip. Push the cassette up until the back ridge slides in and clips into the back of the top clip, snapping the headrail into place.
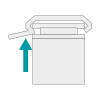
If you need to take the blind down from the brackets once it has been installed, push the protruding tab on the bracket upwards which opens the bracket slightly. Next twist the back of the headrail downwards to release the blind.
Step 3 - Standard (without Headbox)
The chain tidy will be attached to the chain when the blind arrives. The chain tidy should be at a maximum distance from the control mechanism, keeping the chain taut (not under excessive tension however as this could negatively affect the longevity and operation of the blind). Put the retaining device on the wall, mark fixing holes with a pencil, drill the holes and screw the device to the wall with suitable fixings.
