Installing Double Roller Blinds
-
You overcame the measurement minefield and now you must face the final challenge – installing your double roller blind. Honestly, it isn’t half as bad as you think it is, it's just a case of getting the brackets in place and then putting barrels up into the brackets! Simple! Firstly, you need to remember how you measured for your blind. This affects where you attach the brackets.
Step 1
There are two ways of attaching your blind’s brackets: either attach them to ceiling (or top of the recess) or to the wall or window frame (depending on how you measured your blind in the first place).
Fitting the blind to the wall or window frame is called face fix. To fit the brackets, you should use a thin wood drill bit (if attaching it to the window frame), or if it is going on to the wall, use a masonry drill bit with wall plugs (make sure the drill bit and the wall plugs are the same size).
The alternative way of installing your blind is to attach these brackets to the ceiling with the blind hanging below, which is known as top fix.
If you wish to use bracket covers on a blind going into the recess, be sure to account for the size of the cover before screwing in the brackets as it might be a tight fit.

Step 2
Once the brackets are up you can add the bracket covers. These will simply slide onto the brackets, giving your blind a professional and clean finishing touch if outside of the recess. Make sure to do this before you fit the blinds.
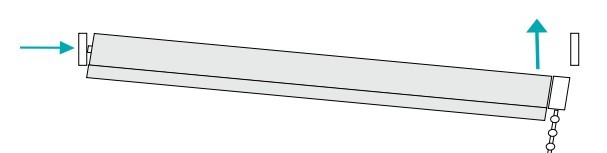
Now it’s time to attach the two blinds. Starting with the blind closest to the window (as standard the dimout roller blind here), attach the end opposite the controls (as standard this will be the right-hand side), and then attach the control end. Hey presto! Blind number one is up and you simply need to repeat this process for the second blind. The two blinds as standard have been designed to have the controls at opposite sides. (Dimout at the rear with left-hand control, Blackout at the front with right-hand control).
Once the brackets are up you can add the bracket covers. These will simply slide onto the brackets, giving your blind a professional and clean finishing touch if outside of the recess. If you wish to use bracket covers on a blind going into the recess, be sure to account for the size of the cover before screwing in the brackets as it might be a tight fit.
Step 3
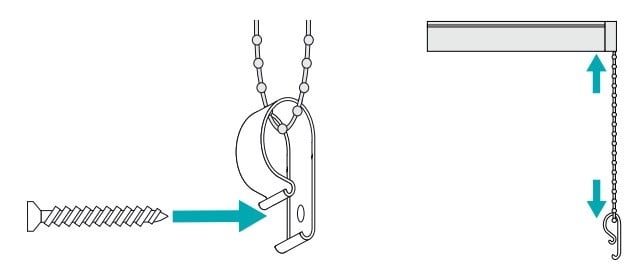
Finally, attach each of the child safety devices. The cord retainer should be at the maximum distance possible from the control mechanism, keeping the chain taut. Put the retaining device on the wall, mark the hole with a pencil, drill the hole, insert a wall plug and screw the device to the wall. And there you go – your blind is safely up, so all that’s left is to give it a quick test.
Changing the Roll
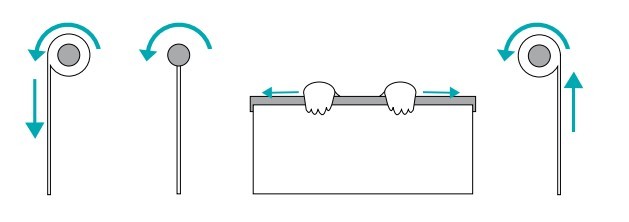
If you wish to change the way the blind is rolled, which is sometimes a good idea if you are trying to avoid window handles or other protruding objects, then simply unravel the blind and then re-roll it in the direction you want. This will only work on standard blinds and not cassette blinds where you can’t get to the roll of fabric.