Installing Vertical Blinds
-
Installing your vertical blind is the fun part of the whole process – you finally have the chance to see these beautiful blinds in action.
Step 1
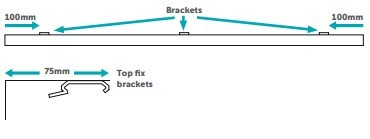
Brackets must sit on each side of the rail, about 100mm away from the end. Make sure the remaining brackets are evenly distributed along the rail. If you are using top-fix brackets (brackets that attach to the top of the recess), you need to position the front edge of the bracket at least 75mm away from the window behind the rail, otherwise you’ll have trouble rotating your louvres.
Step 2
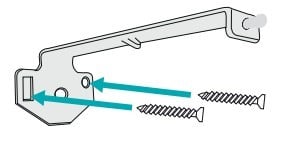
If you’re using a face-fix bracket, mark the holes where you will need to install the blinds, drill the holes, insert the wallplugs, screw into them to attach the bracket to the surface and slide the rear ridge of the rail into the hook of the bracket. Tighten the screw at the front to hold it all into place.
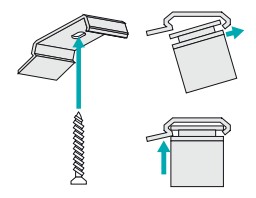
Step 3
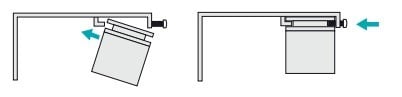
For those opting for the top-fix bracket, use a single screw to attach the bracket to the top surface of the recess. Then clip the rail in by putting the front lip in to the bracket and then clicking the back in.
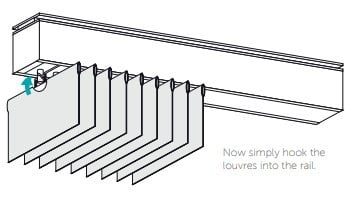
Step 4
Now simply hook the louvres into the rail.
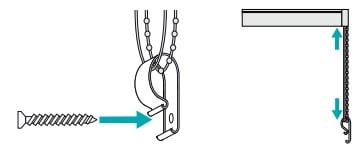
Step 5
The chain tidy will be attached to the chain when the blind arrives. The chain tidy should be at a maximum distance from the control mechanism, keeping the chain taut (not under excessive tension however as this could negatively affect the longevity and operation of the blind). Put the retaining device on the wall, mark fixing holes with a pencil, drill the holes and screw the device to the wall with suitable fixings.