 Delivered in
3 to 5 working days.
Delivered in
3 to 5 working days.
 Up to 4.85m
  Same Day Dispatch


Teramo White XL Mains Electric Roller Blind
The Teramo White XL Mains Electric Roller Blind is a high quality Screen fabric on a heavy duty mains electric roller blind capable of going to widths and drops standard electric roller blinds can't reach. To account for these larger sizes the barrel and brackets are slightly larger and uses mains electricity to operate, making it ideal for high installations where it isn't always easy to access the blind to charge a battery. The maximum width our XL mains electric blinds can reach is a width of 4850mm (4.85m) with a drop of 2150mm (2.15m). Naturally, as the width of the blind is reduced we're able to increase the drop, so we can manufacture this blind to a drop of 5750mm (5.75m) if the width is 2150mm (2.15m) or less.
This blind's fabric is made from 70% PVC, 30% Polyester and is as versatile as it is beautiful. Supplied with a White Tear Drop Bottom Bar.
XL Mains Electric Benefits
Mains powered electric blind
Perfect for heavy-duty and XL wide window covering
Larger and more robust barrel for that XL width
Please note controllers are sold separately. Our full range of controllers can be viewed here.
This blind is supplied with a 2m power cable running from the blind and should be installed to the mains supply by a fully qualified electrician. The blind is supplied without a UK 3-Pin Plug.
Not looking to go XL? Fear not, we have the perfect solution for you; check out our extensive range of Electric Roller Blinds more suited to the average window.
Order yourself a free fabric sample to see it in person and check out the technical specs below for more information!
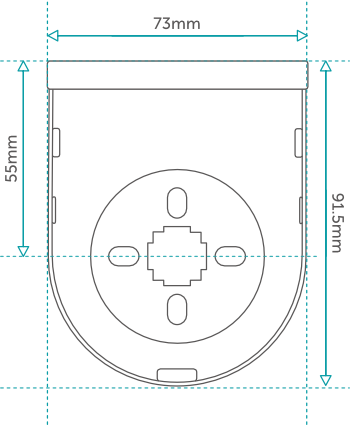
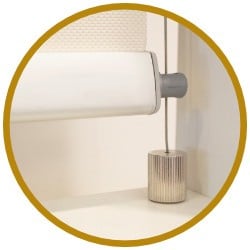
Technical SpecificationsThese blinds need to be hardwired to mains electricity to power the motor but it is controlled by remote control (not included). By default the motor is located on the right-hand side of the blind, but this can be changed to the left side should you require – just get in touch after your order has been placed. The reason it is powered by mains electricity is so that it can be installed at heights that may be out of reach for a charger or chain. As a result, we strongly recommend that the wiring is done by a qualified electrician. Please note this blind is supplied with a 2m AC 230v 50/60hz wire but not with a 3-pin plug. We are not able to provide longer cable and we don't have the capcity to sell 3-pin plugs. The XL Mains Electric Blind consists of a metal barrel with a diameter of 53mm. The brackets are 70mm from front to back, 90mm from top to bottom and the top fixing area is 38mm wide. The maximum width can be 4700mm (4.7m) with a drop of 2150mm (2.15m). Naturally, as the width of the blind is reduced we’re able to increase the drop, so we can manufacture this blind to a drop of 5750mm (5.7m) if the width is 1700mm (1.7m) or less. Please note this blind is supplied with a 2m AC 230v 50/60hz wire but not with a 3-pin plug. Supplied with white metal brackets. The motor is concealed within the barrel of the blind and has an inbuilt receiver. |
Motor SpecificationsNominal Voltage: 230v – 50HZ |
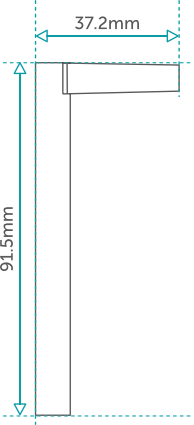
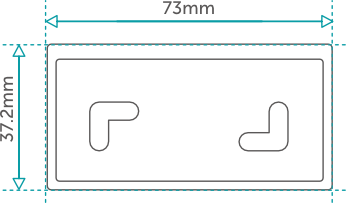
Bracket Dimensions.Naturally with XL Roller Blinds the brackets required to hold the larger blinds need to be a little "beefier" too! Brackets measure at 73mm(w) x 91.5mm(h) x 37.2mm(d). |
 |
 |
 |
 |
Fine Tuning
As standard, our window blinds are awesome, and for many of our customers, this is just what they’re looking for. However, as a manufacturer and experts in made-to-measure blinds, we can offer you the chance to go further, fine-tuning your blind and customising it to meet your exact requirements.
Our fine-tuning options are all optional, and your blind will function perfectly without them, but if chain options, coloured bottom bars and chain lengths calculated to suit your installation height rock your world, read on! Below is an explanation for each option available on this blind, but remember, we’re only a quick call away if you have any questions.
Blind Name
If you’re ordering multiple blinds of a similar size and colour, naming them can be a handy way of identifying which one is which when coming to fit them. Enter a blind name or label, and we’ll include this on the sticker of the packaging to help you identify it.
Direction of Roll
As standard, our blinds are Standard Rolled. The fabric falls from the back of the blind, meaning the fabric will be close to the window. Reverse Roll makes the fabric fall from the front of the blind, which can be handy if you're trying to avoid window handles etc, as well as being purely aesthetical. If you have a preference, you can let us know!

Standard Roll

Reverse Roll
Motor Side
As standard, the motor is fitted to the right hand side of the blind. However, you can choose for the motor and thus the charging point, to be fitted to the left side of the blind. This could be beneficial when charging your motor.

Left Side

Right Side
Bottom Bar
As standard, this roller blinds come with a colour-matched aluminium teardrop bottom bar, as detailed in the product description. This fine-tuning option allows you to change this to an aluminium teardrop-shaped bottom bar in white, silver or black or an aluminium round-shaped bottom bar in white or silver. Alternatively, you can select a fully wrapped fabric bottom bar where the fabric is shown front and back. Aluminium bottom bars are not fabric-covered.
Default Teardrop

White Aluminium Round
Silver Aluminium Round
Fully Fabric Wrapped
White Aluminium Teardrop
Silver Aluminium Teardrop
Black Aluminium Teardrop
Side Guide Wire System
This option allows you to select a side guiding system that sees a 2mm silver wire fitted to the top of the recess or ceiling down to the window sill or floor, that runs through the bottom bar of the blind. This prevents the blind from moving anywhere except up or down. This is ideal for areas prone to breezes or if the blind is fitted at a slight angle. Wire system is available in either Black, Silver or White. Tear Drop Bottom Bar MUST be selected for this system.
Controllers
Your blind will not come with a remote control. Remote controls are sold separately. You can add a Remote Control to your blind order by selecting any of the following:
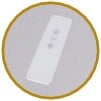
Single Channel Hand Held Remote

6 Channel Hand Held Remote Control
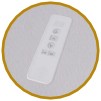
16 Channel Hand Held Remote Control
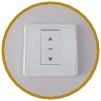
Single Channel Wall Mounted Remote Control Switch
Dual Channel Wall Mounted Remote Control Switch
Motor Options
Our mains-powered electric roller blinds come with an RF motor as standard, operated via a sleek remote or wall-mounted control for effortless everyday use.
Looking to integrate with your smart home setup? We also offer a Non RF Control Wired Motor option featuring a control wire, which can be configured to work with home automation systems – such as Control4, KNX, Lutron, Loxone* – when used with a suitable relay interface like the Animeo Moco*.
Please note: While we're happy to offer this motor option, we're unable to provide support or guidance for third-party home automation installations, as every system is different and may require specialist knowledge. If you're unsure, we recommend consulting a qualified home automation installer.
*Suggested products; other options are available.
How to Measure
Now, you can’t mess this one up. It’s what we call ‘easy’ here at DotcomBlinds. But just in case you need some help, follow this quick guide.
First thing's first, identify whether your blind is going inside or outside of a recess.
Inside the recess

A recess fit blind means you supply us with the width and drop of your recess – from top to bottom and wall to wall. We make deductions to account for the brackets to ensure your blind fits within the recess perfectly.
To measure a roller blind to fit inside the recess of your standard window, simply measure the full width and the height of the recess. Then input those measurements into the product page with your order selecting the ‘recess’ option. We’ll do the rest, leaving you the well-deserved excuse to put your feet up, you worked hard for it after all!
Don’t be tempted to deduct any measurements, we do this for you. For recess fit cord and wand-operated metal venetian blinds, we will make a 4mm deduction to the given width measurement. For recess fit chain operated metal venetian blinds, we will make a 6mm deduction to the width measurement. This is to ensure the blind fits comfortably within the recess, and you do not need to account for these measurements. Make sure you use a metal tape measure; a cloth one can stretch and give you more millimetres per centimetre than a pound-shop ruler. Also, take your measurements in three places and give us the smallest (if there is a smallest). You will find that some recesses shift and settle over time.
Outside the recess
 A blind going outside of a recess is usually called an exact fit blind. An exact fit blind means we won’t make any deductions to the width or drop measurements. Exact fit is the bracket to bracket measurement and is commonly found installed outside of a recess. The size you give us is the size your blind is made to.
If you want your blind to hang outside the recess, measure the height and width but be sure to add some overlap to reduce light leakage. This overlap should be about 70mm at the top and bottom and 50mm each side, ensuring you suffer no dazzling strips of sunlight once your blind is happily installed. Please select the ‘exact’ size option when ordering.
-
How to XL Mains Electric Blinds
Step 1
For our wider blinds, you'll find that the brackets are the same for both sides, and this is to ensure functionality whilst the blind is in situ.
Place your first bracket into position, ensuring your blind won't get in the way of any handles or vents. The brackets can be top fixed or face fixed.
Measure the distance from the window to the bracket and mark the spot you need to drill and repeat this on the other side, ensuring the brackets are level (a spirit level can help gauge this).
Drill the hole, starting with a smaller pilot hole and then going to the wider 5mm drill bit. You should use a thin wood drill bit if attaching it to the window frame and consider using the smaller screws supplied. If you are fitting the blind to the wall, use a masonry drill bit with the wall plugs provided (make sure the drill bit and the wall plugs are the same size).
Important Note: Ensure there is enough space at the pin-end bracket (the end opposite the mechanism) to allow for free movement of the barrel. The pin-end of the blind is sprung to allow for easy removal of the blind and should not be fully compressed as this can cause the barrel to rub on the bracket and make operation stiff.

Step 2

Once the brackets are up you can add the bracket covers if supplied. These optional extras will simply slide onto the brackets, giving your blind a professional and clean finishing touch if outside of the recess. The bracket covers are designed to have a nice tight fit, if you ever need to remove them insert a flat screwdriver into the cutout at the bottom inside of the cover and twist, this will release the cover.
Note: If you wish to use bracket covers on a blind going into the recess, be sure to account for the size of the cover before screwing in the brackets, as it might be a tight fit.
Now it is time to fit the blind. First, attach the end opposite the controls (known as the pin-end), push gently against the pin-end to suppress the pin, lift the control end up and attach to the control end bracket. Allow the blind to drop into its locked position. The bracket needs to sit between the two collars, on the part coloured blue in the illustration. Once locked in place, the blind will need to be pushed up first if it is to be removed and then pushed towards the pin end for the spring to compress, allowing you to pull the mechanism end out.

Changing the Roll
You can change the direction your blind rolls, which is sometimes helpful if you're trying to avoid window handles or other obstructions. To do this, unroll the blind fully until the metal barrel is exposed, then continue winding the fabric in the same direction – this will reverse the roll.
It’s easiest to do once the blind has been paired with the remote and must be completed before any limit stops are set.Top tip: on the first turn of fabric, run a clean finger or flat edge along the fabric where it feeds into the barrel to create a crease – this helps the fabric roll smoothly and evenly from the start.
Step 3 ** IMPORTANT **
Your XL Mains Electric blind is supplied with a 2m power cable running from the blind and should be installed to the mains supply by a fully qualified electrician.
The blind is supplied without a UK 3-Pin Plug.
How to programme your XL Mains Electric Roller Blind
The aim of the game here is to get your remote control talking to your blind so that you can recline in shaded bliss, controlling your blind with the touch of a button. To get there you need to follow these simple steps.
Programming
First thing we need to do is pair the controller to the motor, think of it like connecting a bluetooth device to your phone (only it’s not bluetooth and it’s easier!) On the motor, insert a small screwdriver into the hole marked (see fig 2) the prog button is located at the control end of the blind, (where the mains cable comes out and the small anterior is located, press and hold for one second. This is the ‘PROG’ button. The motor will shunt once. On the remote, press the ‘Up’ button and the motor will shunt again.
Changing the direction of travel
Now, depending on how the blind was installed, the motor’s world can become a bit topsy-turvy. Up means down, down means up, leaving you scratching your head in confusion. Don’t worry, it’s easy to fix. This step lets you tell the blind which direction you want it to move in when you press the relevant buttons on the remote.
Press and hold the “STOP” button on the transmitter for five seconds. The motor will shunt once. Press the ‘Down’ button and the motor will shunt again. Everything has been restored to its rightful place.Limit positions
The remote is speaking with the motor, the motor knows which way is up and which way is down, so now you need to tell it where the top and bottom of the window is.
Using the thin screwdriver, press the “PROG” button on the back of the remote, holding it for one second. The motor will shunt once.
Now you need to adjust the blind to the spot where you want it to stop every time the blind rises by using the up and down buttons. Once it is in place, press the “PROG” button on the back of the remote for one second, saving the limit stop.
To set the bottom limit stop, press the down button until it is in place, press and hold the “PROG” button for one second and the motor will shunt. Press and hold the “PROG” button again for one second and it will shunt again, indicating the bottom limit stop is set.Stop points in between
This is the exciting part, the reason you opted for an electric blind in the first place. With the top and bottom limits set, you can add up to four more stop points in between, so that the blind will stop at various heights.
To do this, adjust the blind to the spot where you want it to stop every time the blind rises or lowers by using the up and down buttons. Once it is in place, press the “PROG” button on the back of the remote, the motor will shunt one. Press the same “PROG” button again and the motor will shunt once more saving the limit stop.
The motor can store a maximum of six stops, with the furthest two called the UP and DOWN limit stops. The stops in between are called stop points. You can’t set stop points outside of the limit stops. You are able to finer tune the stop points’ positioning, or delete individual stop points separately. Pressing the Up or Down button twice within one second on the remote will instruct the motor to go to the top or bottom without stopping at the middle stop points.Delete Stop Points
Run the motor to the stop point you wish to delete. Press the “PROG” button on the back of the remote for seven seconds. The motor will shunt once and within seven seconds it will shunt again, indicating that the stop point has been cleared.Deleting All Limit and Stop Points
By deleting all of the memories stored in the motor, you will be reverting it back to factory settings.
Method 1 : Press the ‘Stop’ button for five seconds. The motor will shunt once. Press and hold the “PROG” button on the back of the remote for seven seconds and the motor will shunt again. The motor will shunt twice once more, indicating that the memory has been cleared.
Method 2 : Press the “PROG” button on the motor for 7 seconds. The motor will first shunt once and then again after 7 seconds indicating the memory has been cleared.And there you have it: you’ve programmed your DotcomBlinds blind and you’re all set to enjoy your blind in electrical bliss.
‘Why do I have to do this?’
‘Can't you have done it for me when you made my blind?’
Good point and the short answer is yes! However, knowing where you want to set your stops is a completely personal thing and if we did it for you then it could cause you frustration when installing and operating the blind and you'd end up performing a factory reset and doing it yourself! Instead we test every motor and controller and then in the final stage of testing, we reset them. This means we have peace of mind knowing that all's good and you'll be able to set it up the way you want.
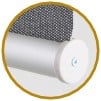
Tear Drop Bottom BarsOur Premium XL Roller Blind range now includes an upgraded Tear Drop Aluminium Bottom Bar. Tear Drop
bottom bars provide the perfect finish to your new blind. Available in White, Silver or Black
finish, we automatically colour match your chosen fabric to the appropriate bar finish. |
|
|
|
Tear Drop Bottom Bars in White, Silver and Black finish. |
 |
| If you wish to change the colour from the default, please email us at [email protected] as soon as you’ve placed your order, and we can make that change. |

Premium Mains Electric XL Wide Blind Sizes
Our XL Mains Roller Blinds can be made to a maximum width of 4850mm (4.85m) and a maximum drop of 5750mm (5.75m)
When manufacturing our blinds, we take into consideration the weight of the hardware as well as the fabric to ensure smooth operation of the blind, the proportion of width/drop availability of our XL Mains Electric blinds is displayed below:

Please note: Depending on your choice of fabric and the size of your blind (Width/Drop), there is a chance your XL roller blind will have a join in the fabric running horizontally near the top of the blind. Where possible, we will always try to avoid this, but it may be necessary to weld the join in the fabric to ensure no light can get through.
To find out whether your blind will require a join, please get in touch with our customer service team member before ordering, and we can advise.
2-3 Year Warranty
A blind from DotcomBlinds is made to the highest standards, designed to provide you with years of service and shade.
In fact, we’re so confident and proud of our blinds, we offer a 2 year warranty on the motor and 3 years on the barrel fabric and bottom bar of the blind. This is one of the longest warranties available and a clear sign of the quality of our blinds.
Obviously, there are a few exclusions:
✖ Damage caused by poor installation/not following fitting instructions (don’t worry, installation is easy, read this.)
✖ Misuse or Failing to maintain the blind
✖ General wear and tear and fading (these blinds are exposed to very intense UV rays)
✖ Alteration to the blind
✖ Exposure to the elements or fitted in an unsuitable location (these are indoor blinds!)
However, if your blind stops functioning for any reasons other than those listed above, get in touch. Our warranty covers:
✔ Manufacturing defects
✔ Fabric/slat colour fading within a year
✔ Mechanical malfunction
✔ 2 year warranty on battery motors used in electric roller blinds
So, in summary, avoid grossly mistreating your blind, show it a little TLC every so often and don’t use it in ways it wasn’t intended. If you do all those things and something goes wrong with the blind, you’re golden – we’ve got you covered and we’ll and repair or replace it free of charge.
Right-Size Guarantee
Sometimes you just need some peace of mind when you come to place an order for your blinds. With DotcomBlind’s Right-Size Guarantee you can have just that. With our Right-Size Guarantee we will replace one blind or curtain with the correct size if you get the measurements wrong when you order. Please note, the Right Size Guarantee excludes Cassette Blinds.
Why do I need this Insurance?
We can’t accept returns or provide refunds for blinds that are mis-measured because all of our blinds are made to measure and so the onus is on the customer to get the measurements right for their blinds. Sometimes you might just be having an off-day, get your centimetres and inches mixed up and end up with a blind that is nigh-on useless. With our Right-Size Guarantee we will take that one blind back, remake it to the correct size for you and send it back, saving you from having to buy a totally new blind! The Right Size Guarantee covers all made-to-measure blinds and curtains except our Cassette Blinds.
How does it work?
✔ Purchase Right-Size Guarantee when you place your order
✔ If one of your blinds has been measured incorrectly, get in touch with us within 14 days and we’ll tell you how to return the blind to us.
✔ Once your blind is with us, we’ll remake it or adjust the blind to your correct measurements and send it back.
✔ Please read our terms and conditions for full details as you will incur additional costs returning the blind to us.
Buy Now Pay Later with Klarna
DotcomBlinds is pleased to be partnered with Klarna, providing you with more ways to pay.
At the checkout you will see Klarna provides two options: Pay in 3 Instalments or Pay Later.
Pay in 3 Instalments
With Klarna’s option to pay in three instalments, you can spread the cost of your purchase across three interest-free monthly payments.
To pay with Klarna’s ‘Pay in 3 Instalments’ option, you just need to be a UK resident over the age of 18 years old and have a valid payment card.
Pay Later In 30 Days
The second Klarna payment option you’ll find in the checkout is to buy now & pay later with their ‘Pay Later in 30 Days’ option at the checkout.
With this payment option, you make your purchase now and don’t pay until 30 days after we have shipped your product to you, giving you plenty of time to save up!
To pay with Klarna’s ‘Pay Later in 30 Days’ option, you just need to be a UK resident over the age of 18 years old and have a valid payment card.
If you have any questions, please don’t hesitate to get in touch with us.
Free Samples?
Free samples are available on all of our fabrics and slats. Simply click the ‘order free sample’ button.Your free sample will be added to the basket ready for you to checkout. You can carry on browsing, adding up to 10 samples to your basket. When you’re ready, checkout – delivery is free too – and relax, our samples will be on their way to you in no time. When they arrive you'll find a handy label with the name and key features on the back of the fabric sample.
Why order samples?
We always recommend ordering samples to ensure you fall in love with the fabric or slat. Screen resolution and brightness settings vary and you may find some fabrics look a little different in real life to how they appear on a screen. You can hold a sample in your hands, feel the fabrics, the weave and see the opacity before your very eyes, something you can’t recreate online.We’ve made every effort to accurately portray the fabric realistically, but you can never be too careful.
Quick Turnaround
We pride ourselves on the speed with which we can get your free fabric samples to you. We send your samples with first class delivery to be with you the very next day. We often dispatch them the same day you place your order (and most certainly by the next working day if you order after hours or on the weekend). With our fast free fabric sample delivery, you’ll be one step closer to shading your home with some of our fabulous blinds in no time at all!Wipe Clean
This blind features a “Wipe Clean” fabric, which is super easy to clean and perfect for busy households; simply wipe over with a dry cloth to remove dust and any debris or use a damp cloth to remove stains. Ideal for homes with kids or areas close to food preparation (including use around the kitchen sink).
Fire Retardant
This blind features a fire-retardant fabric, providing peace of mind and safety to your home. Our fire retardant fabric is a high-quality material that will not catch fire when presented with a flame; instead, the area that is in contact with the flame will burn but it will self-extinguish once the source of heat has been removed.
Child Safe Plus
Each and every blind made by DotcomBlinds is child-safe, thanks to various safety features and accessories we supply (like P Clips). This cordless blind is what we’d call “Child Safe+” as there is no chain or cord on the blind, completely removing any risk of entanglement with the blind.
Mains Electric Powered
This blind’s motor is powered by mains electricity, rather than an internal battery. Our XL electric motors need to use mains electricity power to be able to pull the weight of an XL blind. We will provide a power wire, which can either be attached to a 3 pin plug and inserted into a power outlet or be wired directly into your home’s mains electricity.
XL Wide Width
This blind is available to be made in our XL sizes. Our Range of Made to Measure XL Wide Width Roller Blinds are a range of premium high-end oversized blinds designed to meet the needs of larger windows. Available in a huge selection of Dimout, Blackout and Screen Fabric perfect to give you the desired amount of shading required XL Wide Width Roller Blinds can be made to a maximum width of 4700mm (4.7m) with a drop of up to 5750mm (5.75m).
SDPD Available
This blind is available on our Same Day Priority Dispatch Service, which is ideal for when you need a blind in a hurry. By selecting the Same Day Priority Dispatch option at checkout, your blind will jump to the front of our production queue, being made and dispatched that same day when ordered before 11am on weekdays (orders after 11 am or on weekends/bank holidays will be prioritised for the next working day). Please be aware that while most SDPDs are delivered the next working day, we do not guarantee next-day delivery.
Made in the UK
This blind is made in the UK in one of DotcomBlinds’ UK factories. By purchasing a blind made right here in the UK you are helping to support the British manufacturing industry. Blinds made in the UK will typically have shorter lead times due to the fact they won’t need to be shipped internationally.
Plain Fabric
This blind features a plain fabric with a solid colour. Plain fabrics are incredibly versatile and can easily be matched to the existing decor in your home or add a fresh new colour to your windows. Be sure to order FREE fabric samples to get a feel for the look and feel of the fabric in person before making a purchase.
Reviews
We're excited to hear your thoughts on this product, but it looks like no one has shared their review yet. Be the first one to share your thoughts.
Highstreet Price Comparison
Our highstreet price comparison calculator works on an average price based on similar made-to-measure blinds sold by highstreet retailers. We compare their blinds to ours using the same measurements, same type of fabric and same mechanism, doing our best to find a like-for-like system. To find out more, click here.

You May Also Like


